8 Steps Toward a Perfect Paint Job
Need to freshen up a room in your home with a new paint job? Follow these steps from our Hatfield, MA Paint Pro Steve DeJoy on how to paint a wall to get a durable long-lasting finish.
While these steps are standard protocol for painting any surface, we’ll address painting walls for this blog. You can follow these same basic steps when painting walls, floor trim work and ceilings keeping in mind the subtle differences when cleaning and repairing other surfaces like wood versus drywall.

Are you painting walls, floors, ceilings or trim? This is an important question to start with as each type of project often requires a different type of paint, application style and process. While these 8 steps can be applied to most painting jobs, it is still good to have a plan of attack when starting your project.

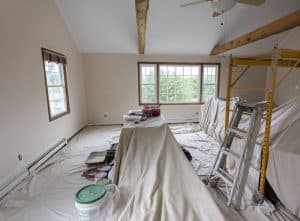
Make sure you have the proper space to work. Move or cover furniture and use drop cloths to protect floors so you have a proper working area from start to finish. Although this step can sometimes be tedious, it’s always worth it in the long run!

This is one of the most important steps. You must have a clean, dry surface for paint to stick. Most surfaces will only need a simple detergent like Dawn® dish soap and water, but more contaminated areas, or especially greasy walls may require TSP (trisodium phosphate). If you aren’t sure what the best product to use for your project is, consult with the paint pros here at rk MILES. NOTE: If using TSP, wear protective gear and consult the manufacturer’s instructions to take necessary precautions.

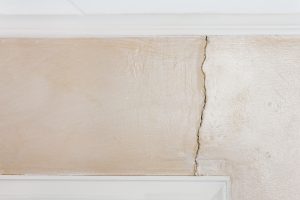
Look for and identify any nail holes, cracks, loose surfaces and imperfect corners. If these are not addressed before you begin to paint, they could pose problems later on in the process.

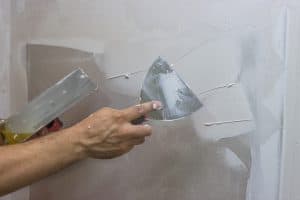
Take the time to address these imperfections. Use a lightweight nail hole filler for small patch jobs while larger voids may require the use of wall patches, joint compound or spackle. NOTE: Do not cut corners by over filling in one single coat as most patching material shrinks when it dries, so two or three coats of filler is necessary for larger patches. Make sure to sand your patchwork once complete.

Priming is the most important step to make sure that your final coat bonds well to the surface. We recommend that you prime all surfaces that you want to repaint but pay special attention to new patches and repairs. If patches are not primed, they will show through to the final coat (this is called flashing). Priming will create a neutral surface. Caulk if necessary but make sure to use a paintable caulk. NOTE: Have problem areas like stains? Visit our paint pros to learn about special problem-solving primers.

This is often the most difficult step. The only way you should pick your color is by seeing it in your space, in the light that it will be presented. We recommend that you don’t just rely on paint chips at the store to help you choose but rather buy a few paint samples and apply large patches to the wall or room. Look at your color samples at the time of day you will use the space most – if you only use that space when there is a lot of natural light, look at the sample colors at that time. If you only use the space in the evening with lamplight, then look at the samples then. Bottom line, never choose a paint color in the store without testing it first.

The type of surface you are painting will often determine your topcoat finish. For example, if you have a wall with a lot of imperfections to cover, use a matte finish. If you don’t have a lot of imperfections, then you can use an eggshell finish. If you want your walls to be washable, like in a kitchen or bathroom, then use a satin finish. For trim work and doors, it is best to use a satin or semigloss finish.

 CALL FOR A QUOTE TODAY

